iCloud Syncing - iOS 4.5
This guide will walk you through the steps of setting up the iCloud sync feature in mSecure. First, there are two settings you will need to make sure are setup correctly on each device. These two settings are the email associated with your iCloud account and the iCloud Drive setting. Then we will go through the process of syncing your data with this new account using mSecure on a Mac computer. Let’s get started.
Setting up Your iCloud Account
First, a few notes:
Due to Apple’s security policies, only the Mac App Store and iOS version of mSecure is able to use iCloud syncing
iCloud sync won’t work between different iCloud accounts because Apple doesn’t allow sharing of files between iCloud accounts.

iOS Settings
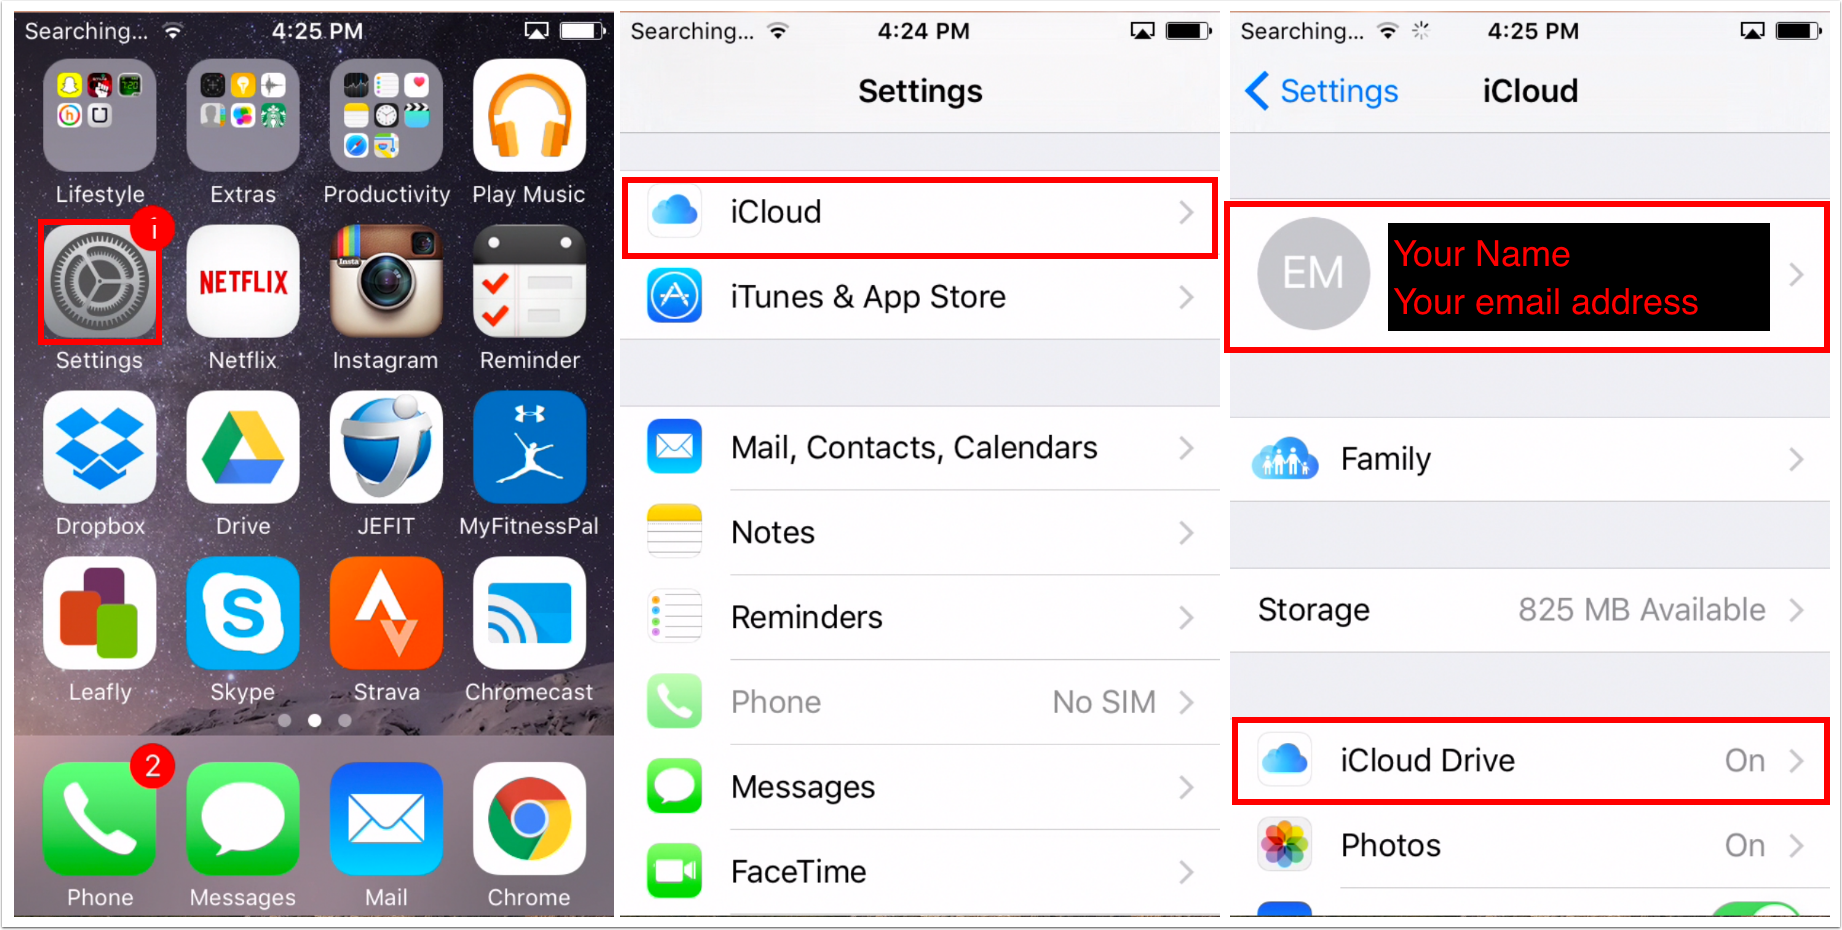
First, open your iOS’s Settings, tap on iCloud, and make sure to that your iCloud Drive is enabled. Please also make sure to verify the username and email address being used. The email address must be the same on your other Apple devices if you plan on using iCloud syncing in mSecure on those devices.

Sync Button
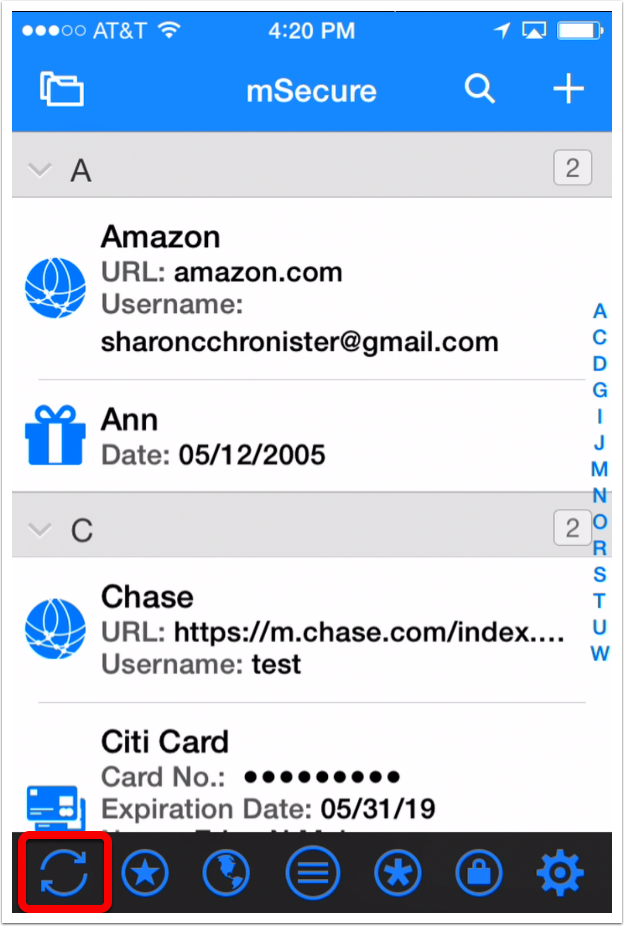
Now open mSecure on your device, enter your password to login, then tap on the Sync button in the bottom toolbar. The Sync Setup screen will appear.

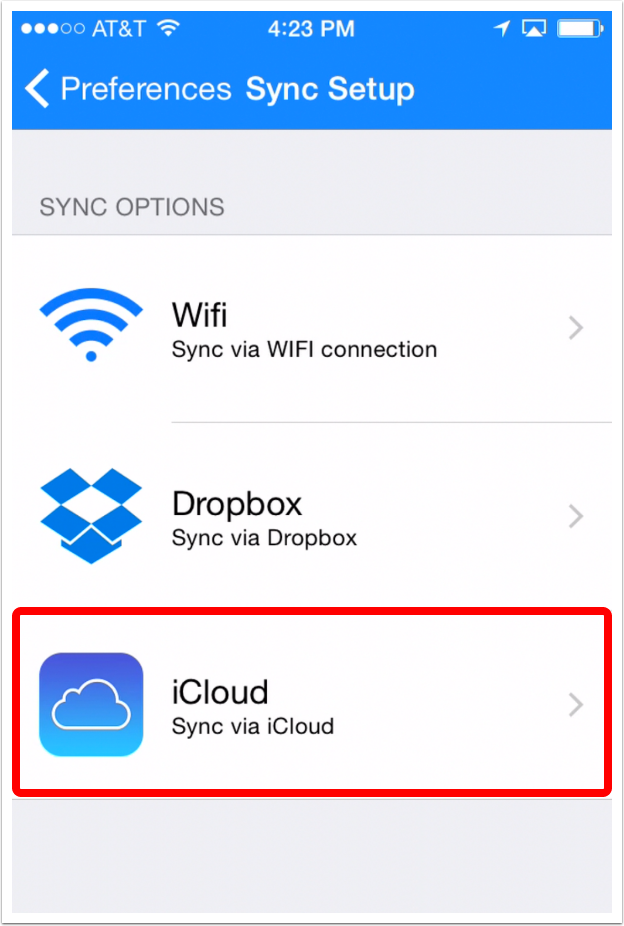
Sync Setup Screen
Tap on the iCloud option to start the iCloud setup process.
NOTE: After the initial setup, the Sync Setup screen is reached by going to mSecure’s preferences and tapping on the Sync Setup menu item.

Sync Settings Screen
Turn on the Sync with iCloud toggle to link your mSecure app to your iCloud account. This will allow mSecure to store your information in your Dropbox account.

mSecure Will Set New Cloud Sync Password
The Cloud Sync Password is a special password shared by all of your devices syncing with the “mSecureSync.mscc” file in your iCloud Drive This password is used to encrypt and decrypt your data stored in that file. Each of your mSecure apps must have the same Cloud Sync Password set in their iCloud sync settings in order for the sync feature to work.
With the release of mSecure 4, we have simplified the process of setting your Cloud Sync Password. After allowing access to your iCloud account, mSecure will attempt to set the Cloud Sync Password automatically using your login password. If it is able to do so, you will immediately see a message telling you the remote sync file has been created using your current mSecure password and hint. If a sync file already exists in your iCloud Drive account, and if that file is secured with a different password than the one you are using to login to mSecure, you will be prompted to enter that password instead, which will be covered in the next section.
Also worth noting, for greater security, you can set a stronger cloud sync password with a mixture of upper and lowercase letters, numbers and special characters to protect the sync file from brute force attacks should a hacker try to gain access to the encrypted data stored in the sync file in your iCloud Drive account.

Set Existing Cloud Sync Password
As mentioned in the previous section, if an “mSecureSync.mscc” file already exists in your iCloud Drive, you may be prompted to set a cloud sync password. If you don’t know your existing cloud sync password, and if you are using the Mac version of mSecure, you can use our iCloud Syncing for Mac guide.

iCloud Sync Setup Completed
Once the sync setup is complete, the sync button in the main view of mSecure will now be active. This button can be used to perform a manual sync of your data. Since the addition of the “Auto-Sync” feature, this button is rarely used because a sync is always triggered within 30 seconds of the last change you made to your data. Any time you add, edit or delete a group, type or record, the auto-sync feature will be triggered.
One possible use for the sync button is if you make a quick change to your database, but you need to close the app very quickly.

Did you find it helpful? Yes No